Bearing Trivia
Oil Seals (Part 3): Handling of seals and seal failure causes and countermeasures
- #4 Oil Seals
In Part 2, we explained how to select the right oil seal.
Oil Seals (Part 2): How to select the right oil seal
In order for the sealing property of the oil seal you selected to really shine, attention needs to be paid to how it is handled. In the event of seal failure, it is necessary to take effective countermeasures beforehand. Therefore, this column will explain the handling of seals, seal failure causes, and their countermeasures.
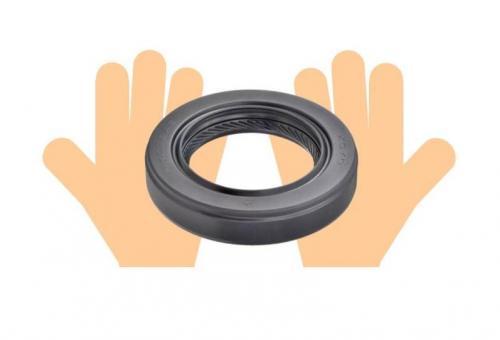
1. Oil seal storage, handling, and mounting
Carelessness in seal handling may cause seal failure. For this reason, it is necessary to take care to perform appropriate storage, handling, and mounting.
1) Storage
Table 1 shows the main points of seal storage.
Table 1: The main points of seal storage
| No. | Main points to be aware of | Remarks |
| 1 | Keep at room temperature (max. 30°C) and humidity 40 to 70% on average. | See Figure 1. |
| 2 | Avoid direct sunlight and electrical devices that emit ozone. | |
| 3 | Do not hang them (to prevent lip deformation and failure). | |
| 4 | Store in a tightly sealed container and protect from contaminants such as dust and sand. | |
| 5 | If storing for a long time, use the ones with the earliest manufacture date first. |
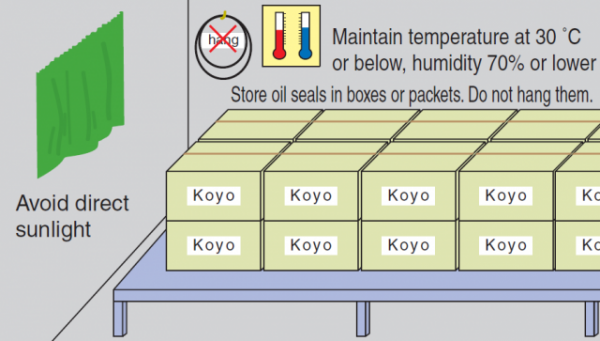
Figure 1: Storage method and conditions
2) Handling
Table 2 shows the precautions for handling oil seals.
Table 2: Precautions for handling oil seals
| No. | Main points to be aware of |
| 1 | When carrying, avoid excessive impact. |
| 2 | When opening the wrapping with a sharp object such as a knife, do not damage the seals. |
| 3 |
Do not leave seals out on a table (to prevent the adhesion of contaminants). |
| 4 | Do not hang them (to prevent lip deformation and failure). |
| 5 | Use kerosene for cleaning. N.B. Using abrasive cleaners, solvents, or the like will negatively affect the rubber material. |
3) Mounting
Table 3 shows the precautions for mounting oil seals.
Table 3: Precautions for mounting
| No. | Main points to be aware of | Remarks |
| 1 | Before mounting, confirm that there is • no dirt, • no foreign particles, and • no damage on the seals. |
Prevents the entry of foreign matter |
| 2 | Feed (apply) lubricant for pre-lubrication (initial lubrication). • Use clean lubricant for the lip. • Use clean grease between the main and minor lips (see Figure 2). See the list below for recommended grease. |
Prevents heavy wear on lip |
| 3 | Recommended grease to be used (applied) between the main lip and the minor lip: • Soft grease (small penetration) • Small penetration change by temperature • Wide serviceable temperature range • Lithium base type |
N.B. Avoid using the following combinations of rubber and grease, as they may cause the rubber to deteriorate or harden Ex. 1: Silicone base grease for silicone rubber seals Ex. 2: Urea base grease for fluoric rubber seals |
| 4 | When the seal is mounted in a cold area, it should be warmed up and its lip flexibility restored before mounting. | |
| 5 | When the structure is such that the component is mounted on the shaft with an interference fit, reducing the lip contact surface shaft dimensions to be roughly 0.2 mm smaller than the bore diameter of the component helps prevent damage on the shaft surface (see Figure 3). | Prevents abnormal contact between the lip and the shaft |
| 6 | When the seal is pressed into a housing bore, use a pressing jig and mount it perpendicularly to the shaft and avoid failures such as scuffing on the fitting surface (see Figure 4). | Prevents fitting surface failure Prevents oil seal lifting (spring back) on the rubber O.D. wall |
| 7 | If the shaft has a spline, keyway, or holes, • use a seal-protecting jig (see Figure 5) • If a seal-protecting jig cannot be used, round the edges of the spline/keyway and apply sufficient grease to the area in question before carefully mounting. |
Prevents lip failure when the oil seal passes above the shaft |
| 8 | If mounting a long shaft, or if mounting heavy housing, use a guide jig to center the seal and shaft and prevent failure resulting from the part of the seal knocking against the shaft (see Figure 6). |
Prevents failure caused by contact with the shaft |
| 9 | If removing the oil seal, use a new oil seal and spacer so the sealing edge doesn't overlap with the trace of the previous lip (see Figure 7). | Prevents abnormal contact between the lip and the shaft |
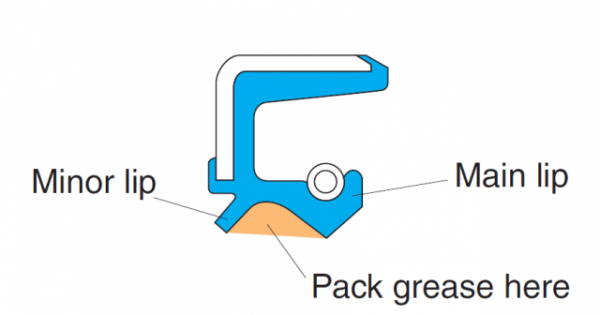
Figure 2: Pre-lubrication for seals with minor lip
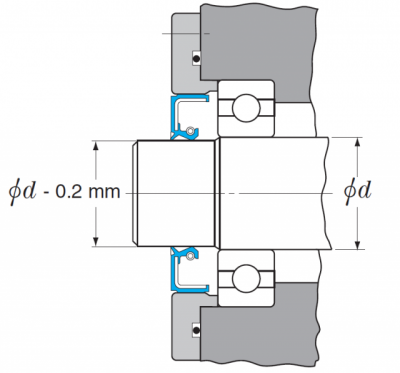
Figure 3: Recommended shaft profile and machine construction to avoid damaging shaft surface
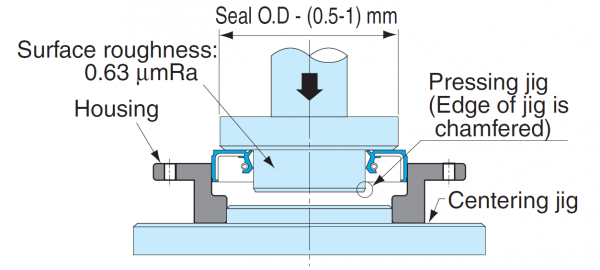
Figure 4: Recommended seal press-fitting jig
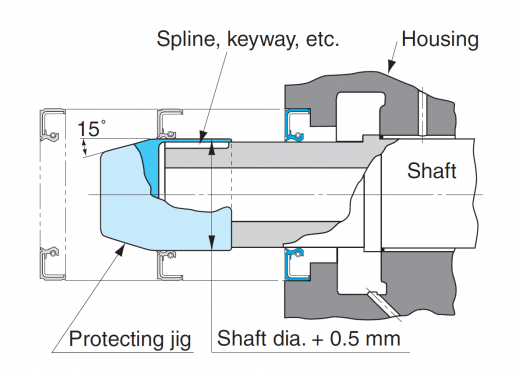
Figure 5: Seal protecting jig for spline, keyway, holes on shaft
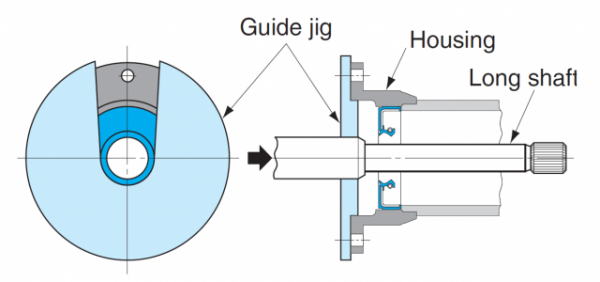
Figure 6: Guide jig for inserting of long shaft into seal bore
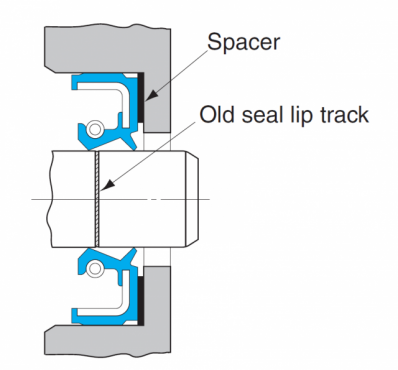
Figure 7: Avoid old seal lip track
For a more detailed discussion of seal handling, please see the following:
Oil seal storage, handling, and mounting
2. Seal failure causes and countermeasures
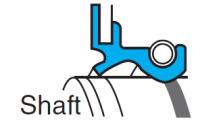
Leakage from the seal can be broadly divided into "leakage from lip" and "leakage from seal fitting area."
Figures 4 and 5 show the types of failure and the appearances of "leakage from lip" and "leakage from seal fitting area" respectively.
Table 4: Failure (leakage from lip)
| No. | Failure | Appearance |
| 1 | Damage on sealing edge | 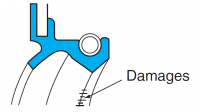 |
| 2 | Lip turned backward | 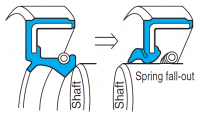 |
| 3 | Missing spring | 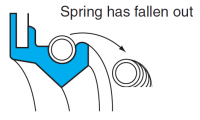 |
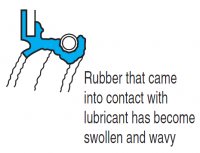
| 4 | Lip hardened | 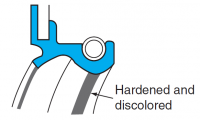 |
| 5 | Lip softening |
|
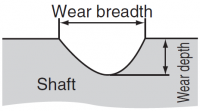
| 6 | Heavy wear on shaft |
|
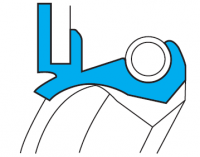
| 7 | Heavy wear on lip | 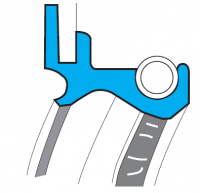 |
| 8 | Lip uneven wear | 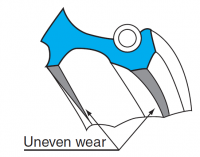 |
| 9 | Rough face and streaks on lip | 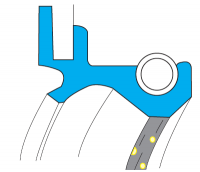 |
| 10 | Tear at seal heel bottom | 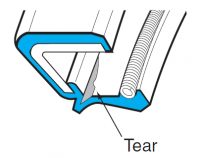 |
| 11 | Lip deformation |
|
| 12 | Lip face contact | 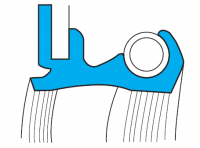 |
| 13 | Lip tear | 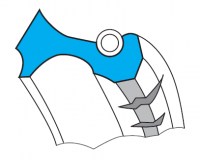 |
| 14 | Blister on lip | 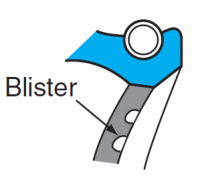 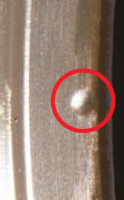 |
Table 5: Failure (leakage from seal fitting area)
| No. | Failure | Appearance |
| 1 | Peeling, scuffing on O.D. wall | 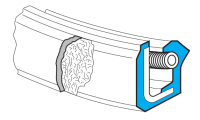 |
| 2 | Damage on O.D. wall | 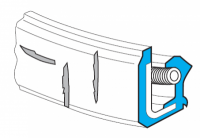 |
| 3 | Deformation |  |
| 4 | Seal inclined mounting |  |
| 5 | Oil seal fall-out | 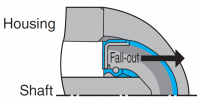 |
Tables 6 and 7 show the major failure types, their causes, and countermeasures against them.
Table 6: Seal failure causes and countermeasures (leakage from lip)
| No. | Failure | Causes | Countermeasures |
| 1 |
Damage on sealing edge
|
1) Sharp edge or burrs on shaft chamfer |
• Remove burrs and polish |
| 2 |
Lip hardened |
1) Temperature exceeded seal service temperature range |
• Change rubber material to high-temperature-proof rubber |
| 3 |
Heavy wear on shaft |
1) Entry of foreign matter |
• Attach prevention device for entry of foreign matter |
| 4 |
Heavy wear on lip |
Excess heat generation due to a) Excess peripheral speed |
• Improve lubrication |
| 5 |
Blister on lip |
Expansion of agglomeration of high-temperature oil entering into the sliding surface a) Deterioration of lubrication |
• Improve lip lubrication |
Table 7: Seal failure causes and countermeasures (leakage from seal fitting area)
| No. | Failure | Causes | Countermeasures |
| 1 | Damage on O.D. wall |
1) Burrs on housing bore |
• Remove burrs and chips |
| 2 | Oil seal fall-out |
1) Larger housing bore |
• Use appropriate housing bore diameter |
For details of failure causes and countermeasures, please see the following:
Seal failure causes and countermeasures
To identify the causes of seal failure and take proper measures, it is critical to observe the seal lip closely and evaluate the failure in all respects, such as shaft surface roughness, contaminants, and lubrication.
3. Conclusion
In this month's column, "Handling of seals and seal failure causes and countermeasures," we conveyed the following points:
1) Carelessness in the storage, handling, and mounting of oil seals may cause seal failure. For this reason, you must take sufficient care in storage, handling, and mounting. A jig should also be used in mounting oil seals.
2) Leakage from the seal can be broadly divided into "leakage from lip" and "leakage from seal fitting area," and various types of failure are categorized according to their appearance.
To identify the causes of seal failure and take proper countermeasures, it is critical to observe the seal lip closely and evaluate the failure in all respects, such as shaft surface roughness, contaminants, and lubrication.
